Alright, let’s be real—who doesn’t love a good English muffin? Whether you’re slathering it with butter, turning it into a breakfast sandwich, or just munching on it plain, these little round wonders are a breakfast staple. But have you ever wondered what makes an English muffin actually so special? Or maybe you’ve tried making them at home and got frustrated? Don’t worry, I’ve been there.
Today, I’m gonna walk you through everything you need to know about English muffins. From their history and what makes them unique, to how to make your own from scratch, plus tips on storing and customizing. Trust me, once you get the hang of these, you’ll be hooked. Let’s get into it!
What Are English Muffins Anyway?
A Quick Breakdown
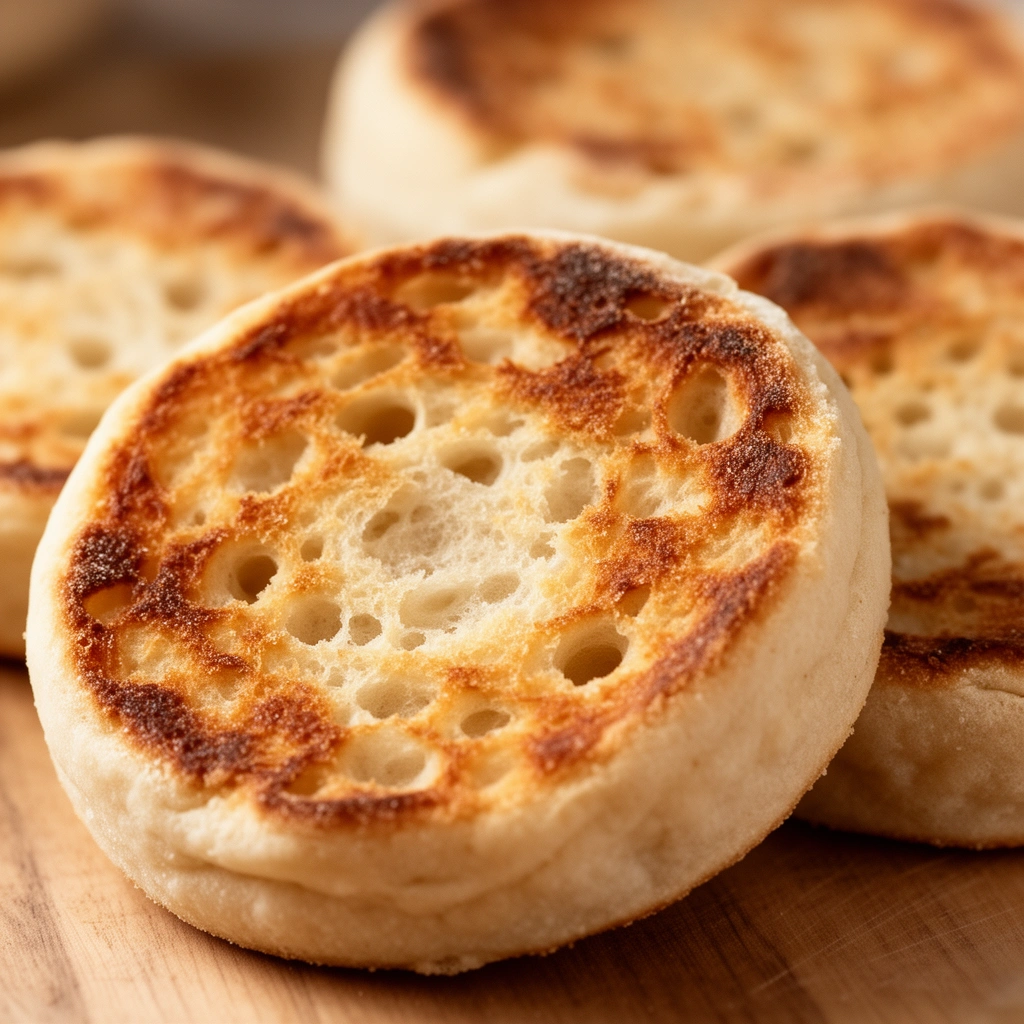
English muffins are small, round, flat bread products with a distinctive texture—crisp on the outside and soft inside, full of those iconic nooks and crannies. They’re usually made from a simple dough of flour, water, yeast, and a few other ingredients, then cooked on a griddle or skillet.
FYI: They’re not the same as bagels, even if they look similar. Bagels are boiled first, which gives them that dense, chewy texture. English muffins skip the boiling step, resulting in a lighter, more open crumb.
Why Do They Have Nooks and Crannies?
This is the hallmark of an English muffin. Those tiny holes are the result of the dough’s fermentation and the way it’s cooked. The bubbles formed during fermentation get trapped in the dough, and when you cook it on the griddle, those bubbles turn into the classic craggy surface. Perfect for holding butter or jam, IMO.
The Key Ingredients
You don’t need a long shopping list to make these at home—just some staples. Here’s what you’ll need:
- All-purpose flour – 2 cups (240 grams). Use bread flour if you want a chewier muffin.
- Active dry yeast – 1 teaspoon. Yeast is the magic that makes these rise and develop flavor.
- Warm milk – 3/4 cup (175 ml). Not hot, just warm enough to activate the yeast.
- Sugar – 1 tablespoon. Feeds the yeast and adds a touch of sweetness.
- Salt – 1 teaspoon. For flavor.
- Butter – 1 tablespoon, melted. Adds richness.
- Cornmeal or semolina – For dusting. Keeps the muffins from sticking and adds a slight crunch.
How to Make English Muffins at Home
Alright, ready to roll up your sleeves? Making these from scratch is surprisingly simple, especially if you follow my tips. Here’s a step-by-step guide.

Step 1: Activate the Yeast
In a small bowl, combine the warm milk and sugar. Stir until the sugar dissolves. Sprinkle the yeast over the surface, give it a gentle stir, and let it sit for about 5–10 minutes. It should foam up—that’s your sign that the yeast is alive and kicking.
Pro tip: If it doesn’t foam, your yeast might be dead. FYI, fresh yeast is worth the extra step for that perfect rise.
Step 2: Make the Dough
In a large mixing bowl, whisk together the flour and salt. Pour in the activated yeast mixture and add the melted butter. Mix until a shaggy dough forms.
Then, knead the dough for about 5 minutes until it’s smooth and elastic. You can do this by hand or with a stand mixer fitted with a dough hook.
Step 3: Let It Rise
Shape the dough into a ball, cover with a damp towel or plastic wrap, and let it rise in a warm spot for about 1 hour. It should double in size and become puffy—proof that fermentation is doing its thing.
Step 4: Shape and Cut
Punch down the dough gently, then turn it out onto a floured surface. Roll it out to about 1/2 inch thickness. Use a round cutter (about 3 inches diameter) to cut out your muffins.
Tip: Don’t re-roll scraps too much—this can make the muffins dense. Instead, gather scraps, knead briefly, and cut again.
Step 5: Cook on the Griddle
Dust a baking sheet with cornmeal. Place the cut muffins on the sheet, cover loosely, and let them rest for 10 minutes.
Preheat a skillet or griddle over medium-low heat. Cook the muffins for about 7–10 minutes per side, until golden brown. Keep the heat moderate so they cook through without burning.
Fun fact: I love to toast them afterward for that extra crispy edge.
Step 6: Cool and Serve
Let the muffins cool slightly before splitting with a fork (not a knife, to preserve those nooks). Serve warm with butter, jam, or whatever floats your boat.
Tips for Perfect English Muffins
- Don’t rush the rising: It’s tempting to bake quickly, but patience makes fluffier muffins.
- Use a good-quality skillet: Cast iron works wonders for even heat and crispiness.
- Adjust heat as needed: If muffins brown too fast, lower the heat. You want a gentle cook to ensure they’re cooked through.

How to Store English Muffins
Proper storage is key to keeping them fresh. Here’s what I do:
- Room temperature: Wrap cooled muffins tightly in plastic wrap or in a resealable bag. They stay good for about 2 days.
- Refrigeration: Not necessary unless you want them to last longer. If you do, store in an airtight container for up to a week.
- Freezing: Wrap individually in plastic wrap, then in foil or a freezer bag. They’ll last up to 3 months. To reheat, pop them in the toaster or oven until warmed through and crispy.
Pro tip: Toasting frozen muffins directly from the freezer saves time and keeps them crispy.
Customizing Your English Muffins
Want to jazz things up? Here are some fun ideas:
- Add herbs or spices: Mix in chopped chives, garlic powder, or rosemary for savory muffins.
- Sweeten things up: Toss in a handful of dried fruit or a sprinkle of cinnamon before baking.
- Cheese lovers: Top with shredded cheese during the last minute of cooking for a cheesy crust.
- Whole wheat or gluten-free: Swap some flour for whole wheat or gluten-free blends to suit your dietary needs.
Final Thoughts
English muffins are a breakfast classic that’s simple to make at home, and once you master the basics, the possibilities are endless. Whether you prefer them toasted with butter or loaded with eggs and bacon, these little guys never disappoint.
FYI, making your own means you control the ingredients—no weird preservatives or additives. Plus, the smell of freshly baked muffins wafting through your kitchen? Pure gold.
So, grab your ingredients, get your dough rising, and enjoy the satisfaction of biting into a homemade English muffin. Trust me, once you go homemade, store-bought just won’t cut it anymore. Happy baking! 😊
P.S. Don’t forget to take a picture of your masterpiece. It’s almost too pretty to eat… almost.
Leave a Reply